Analog pH Sensor Meter Pro Kit V2.0 สำหรับ Arduino เซนเซอร์วัดกรด-เบส สต็อกไทยส่งไว

Analog pH Sensor Meter Pro Kit V2.0 สำหรับ Arduino เซนเซอร์วัดกรด-เบส สต็อกไทยส่งไว
Analog pH Sensor Meter Pro Kit V2.0 สำหรับ Arduino เซนเซอร์วัดกรด-เบส สต็อกไทยส่งไวAnalog pH Sensor Meter Pro Kit V2.0 สำหรับ Arduino เซนเซอร์วัดกรด-เบส สต็อกไทยส่งไวAnalog pH Sensor Meter Pro Kit V2.0 สำหรับ Arduino เซนเซอร์วัดกรด-เบส สต็อกไทยส่งไวAnalog pH Sensor Meter Pro Kit V2.0 สำหรับ Arduino เซนเซอร์วัดกรด-เบส สต็อกไทยส่งไว
รหัสสินค้า AT02000B
หมวดหมู่ Ph / Ec / ORP/ TDS / Oxygen Sensor
ราคา 3,790.00 บาท
ลงสินค้า 24 พ.ย. 2563
อัพเดทล่าสุด 1 มี.ค. 2566
ขออภัย สินค้าหมด
บัตรประชาชน
บุ๊คแบ๊งค์
คุ้มครองโดย LnwPay
สินค้ารับประกัน 30 วัน
Analog pH Meter (pH Sensor) เป็นเซนเซอร์สำหรับวัดความเป็น กรด-เบส ของสารละลายโดยค่าที่วัดได้จะอยู่ในช่วง 0 - 14pH output เป็นแบบ Analog (0-1023) ใช้ไฟเลี้ยง 5V การสอบเทียบ Calibration ทำได้ง่ายกว่า V1.1

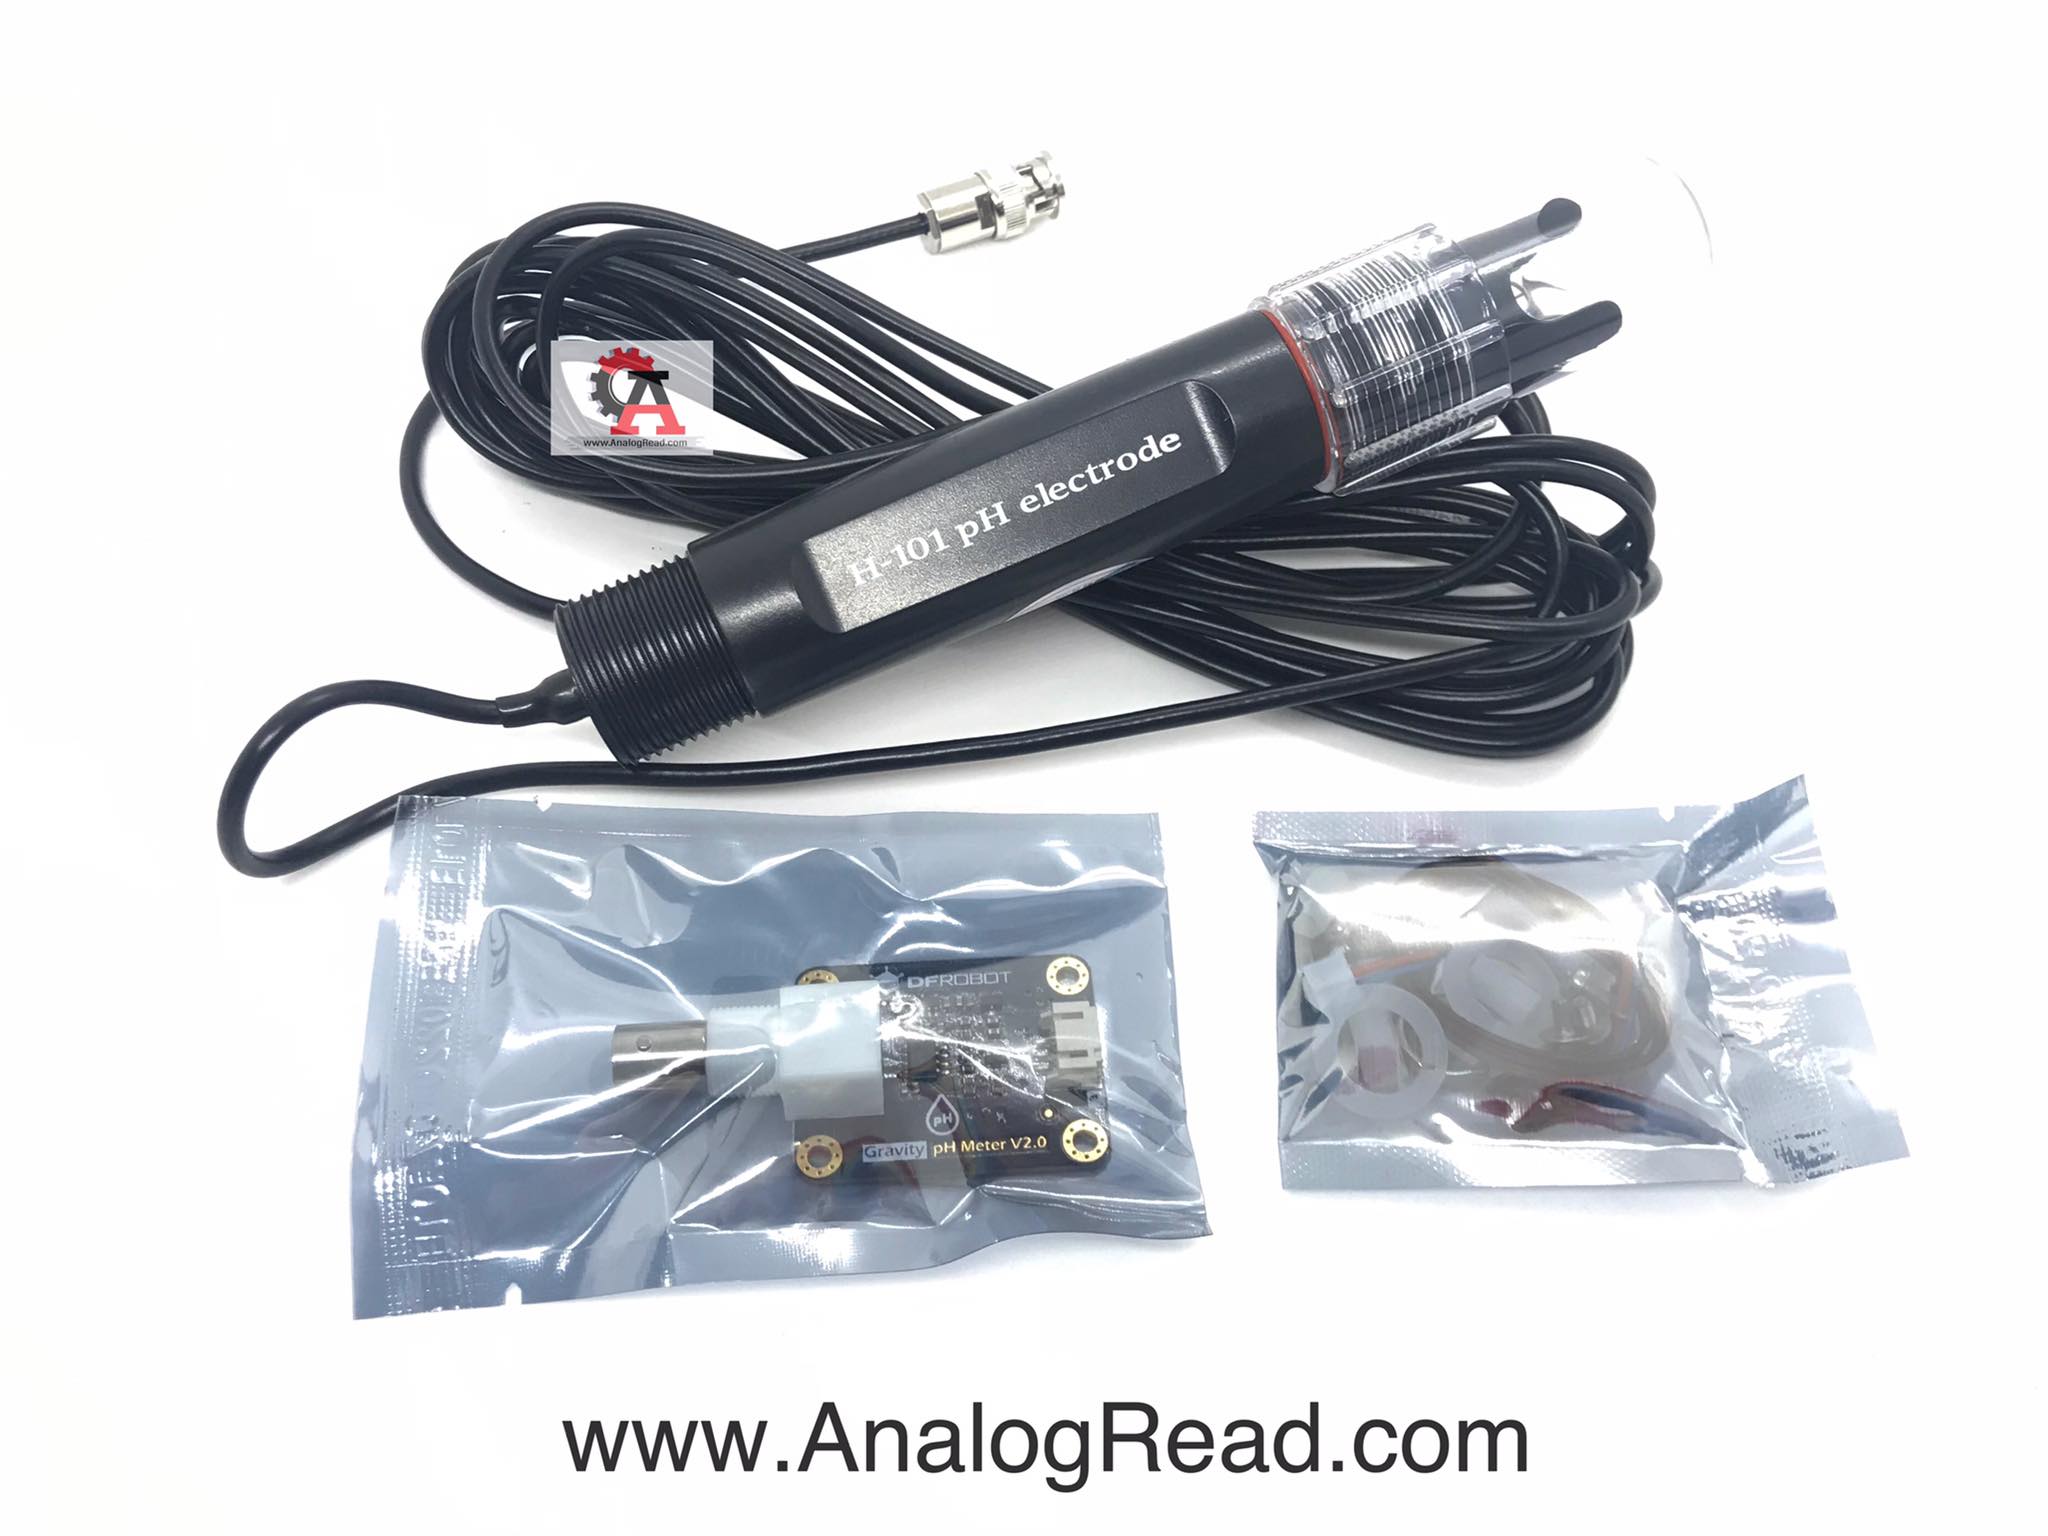
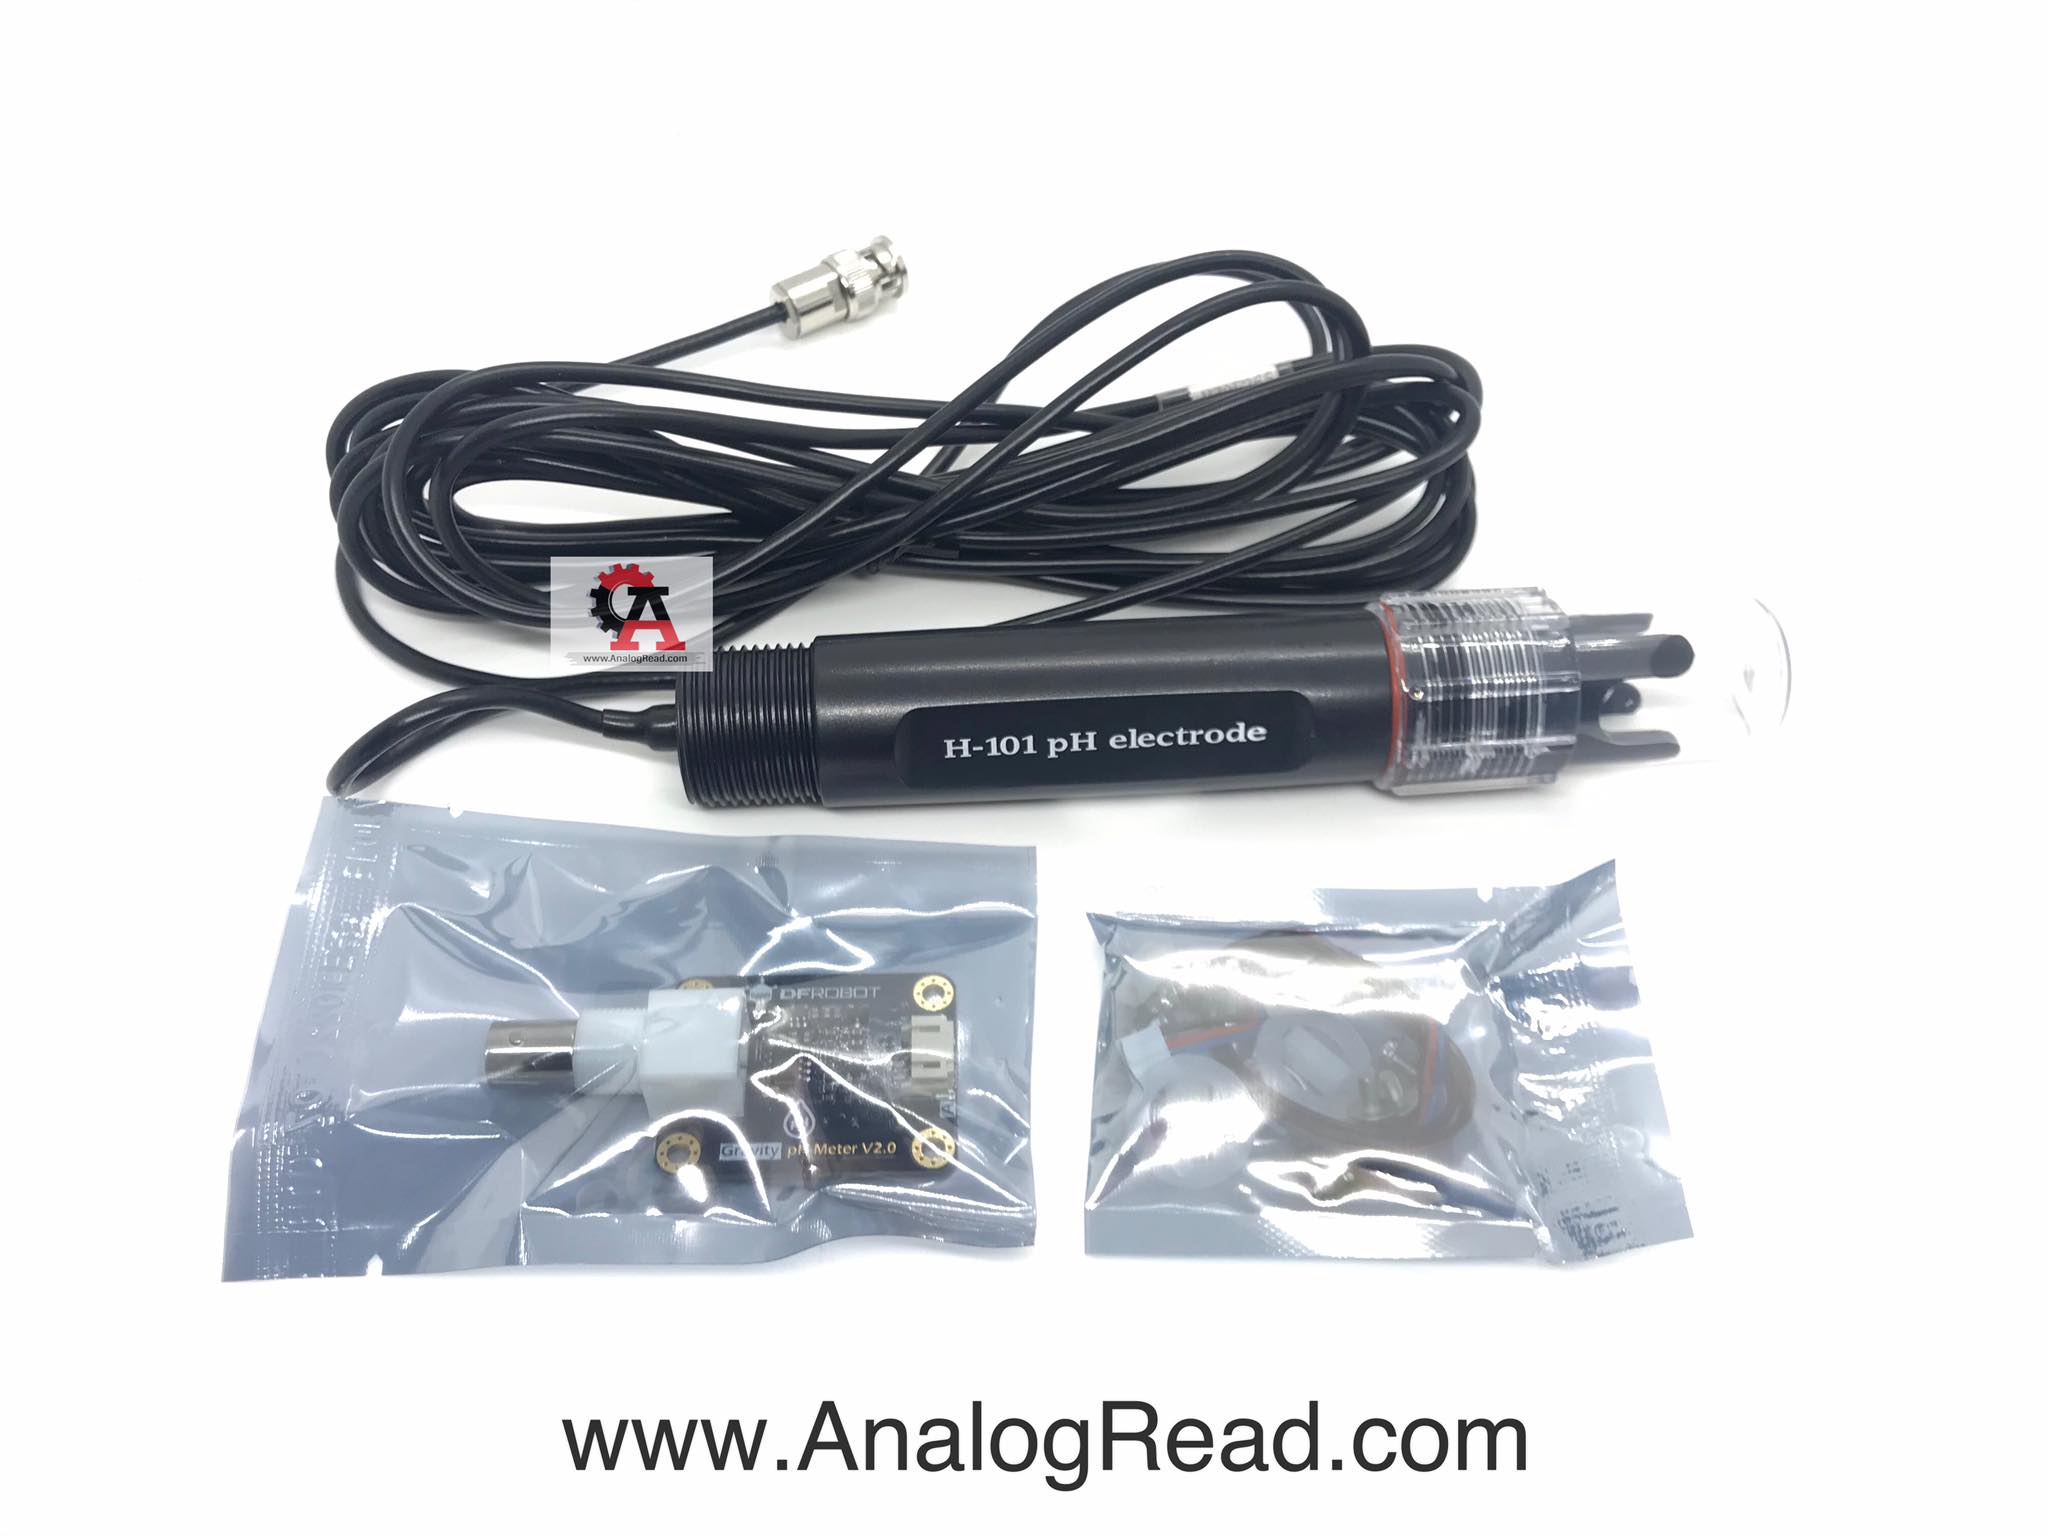
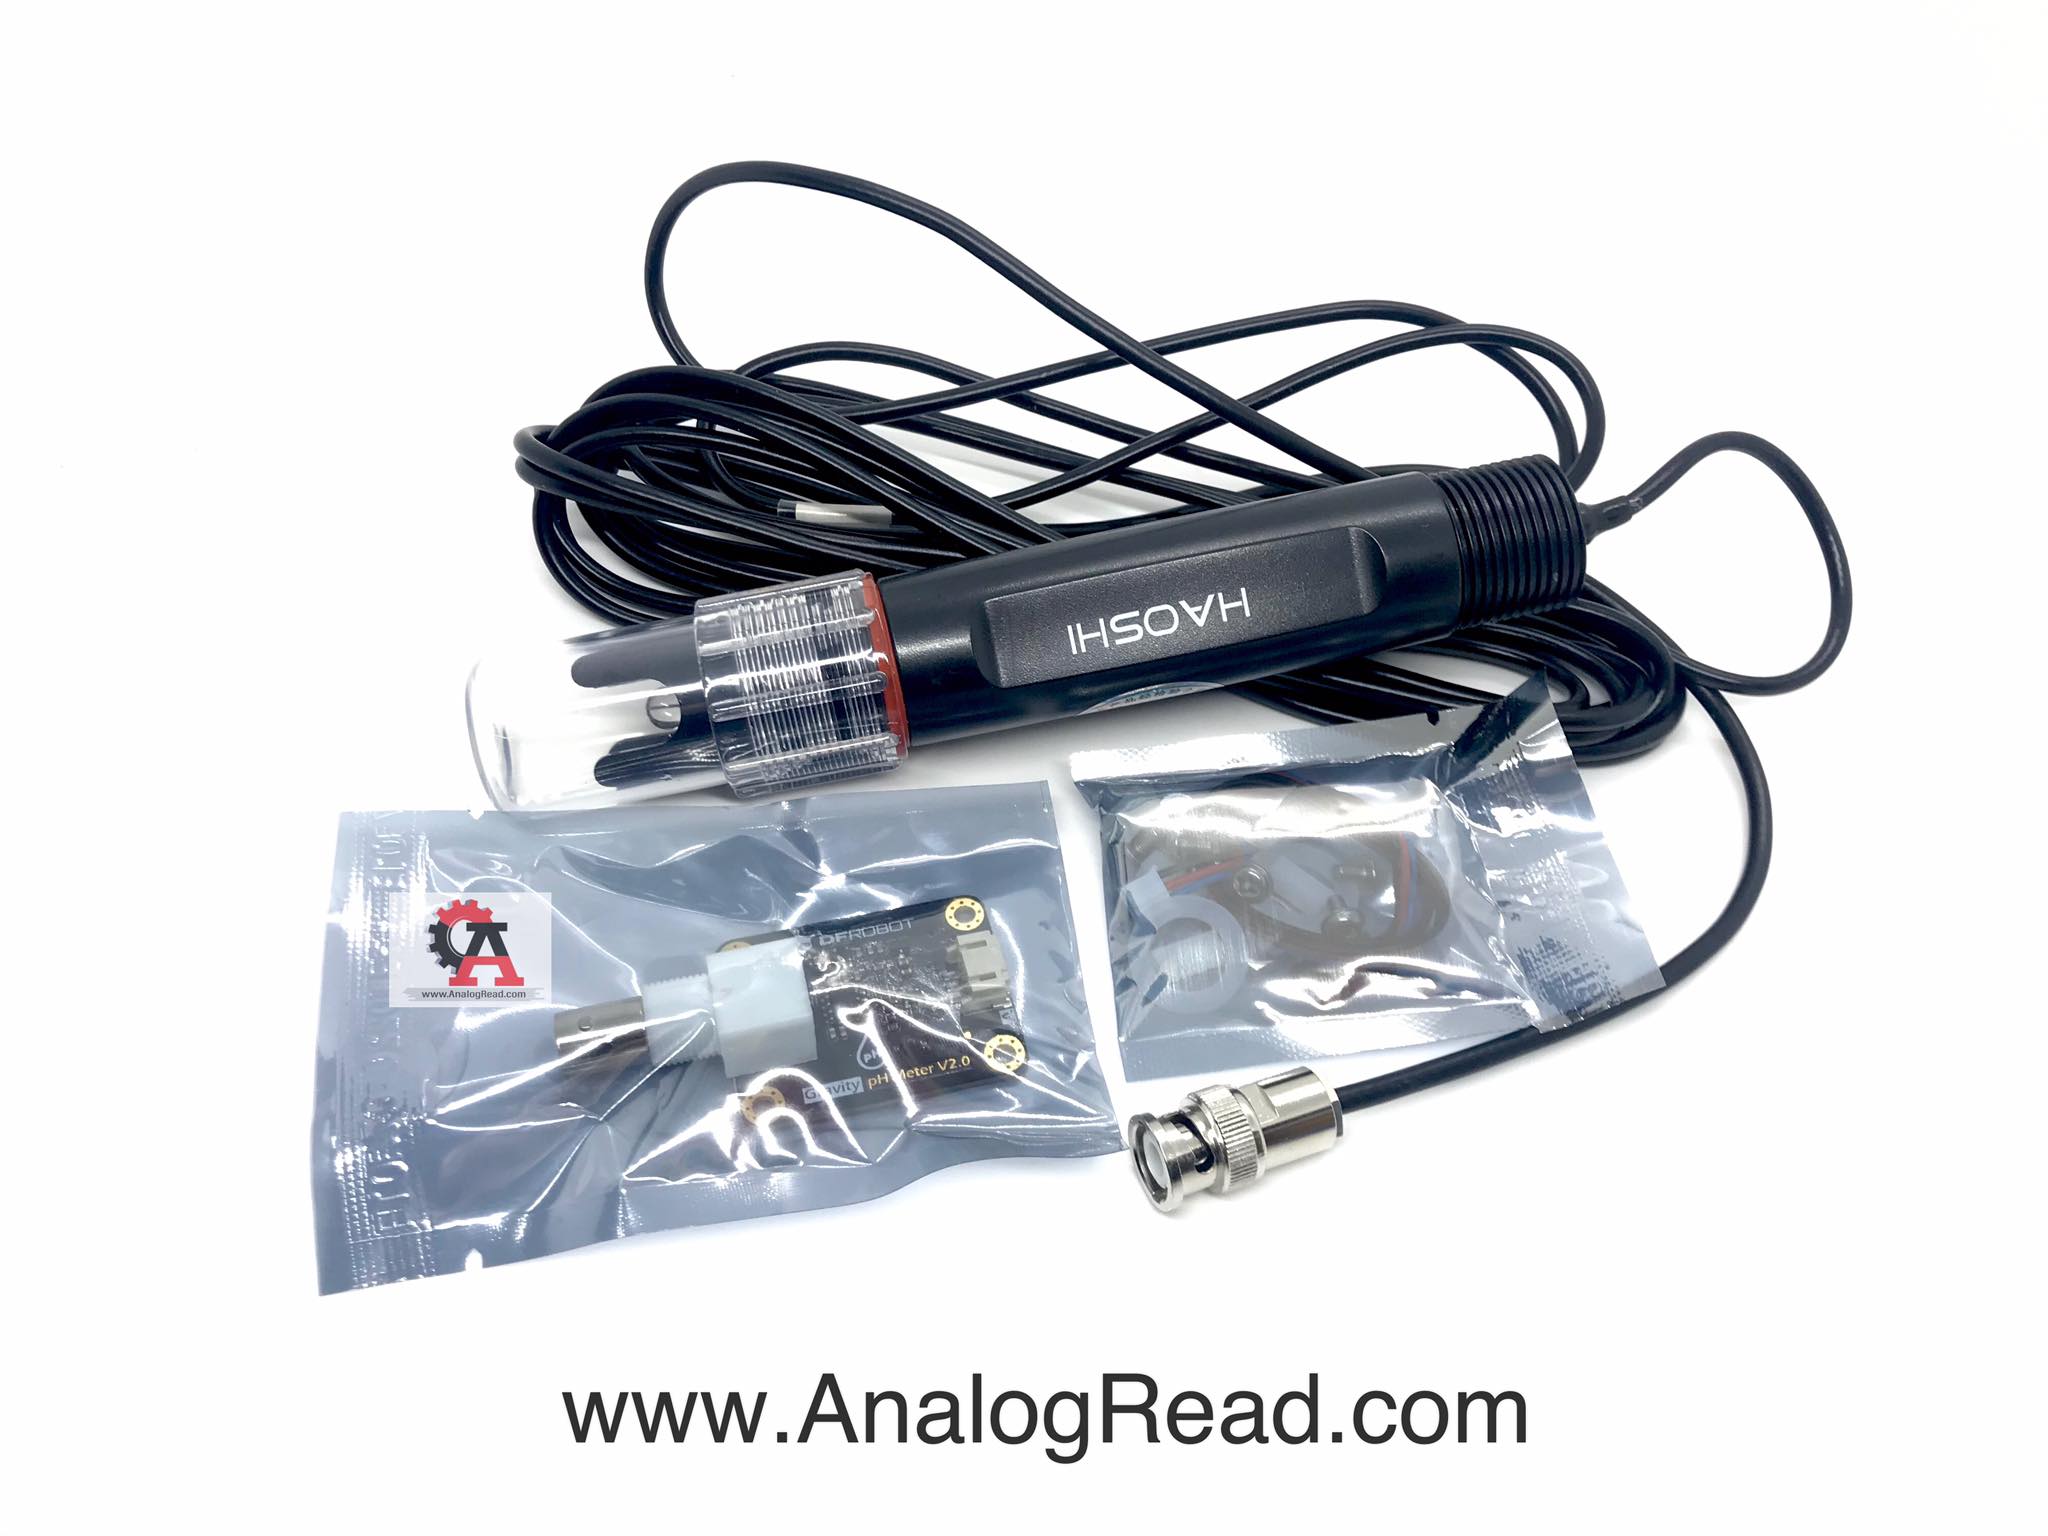
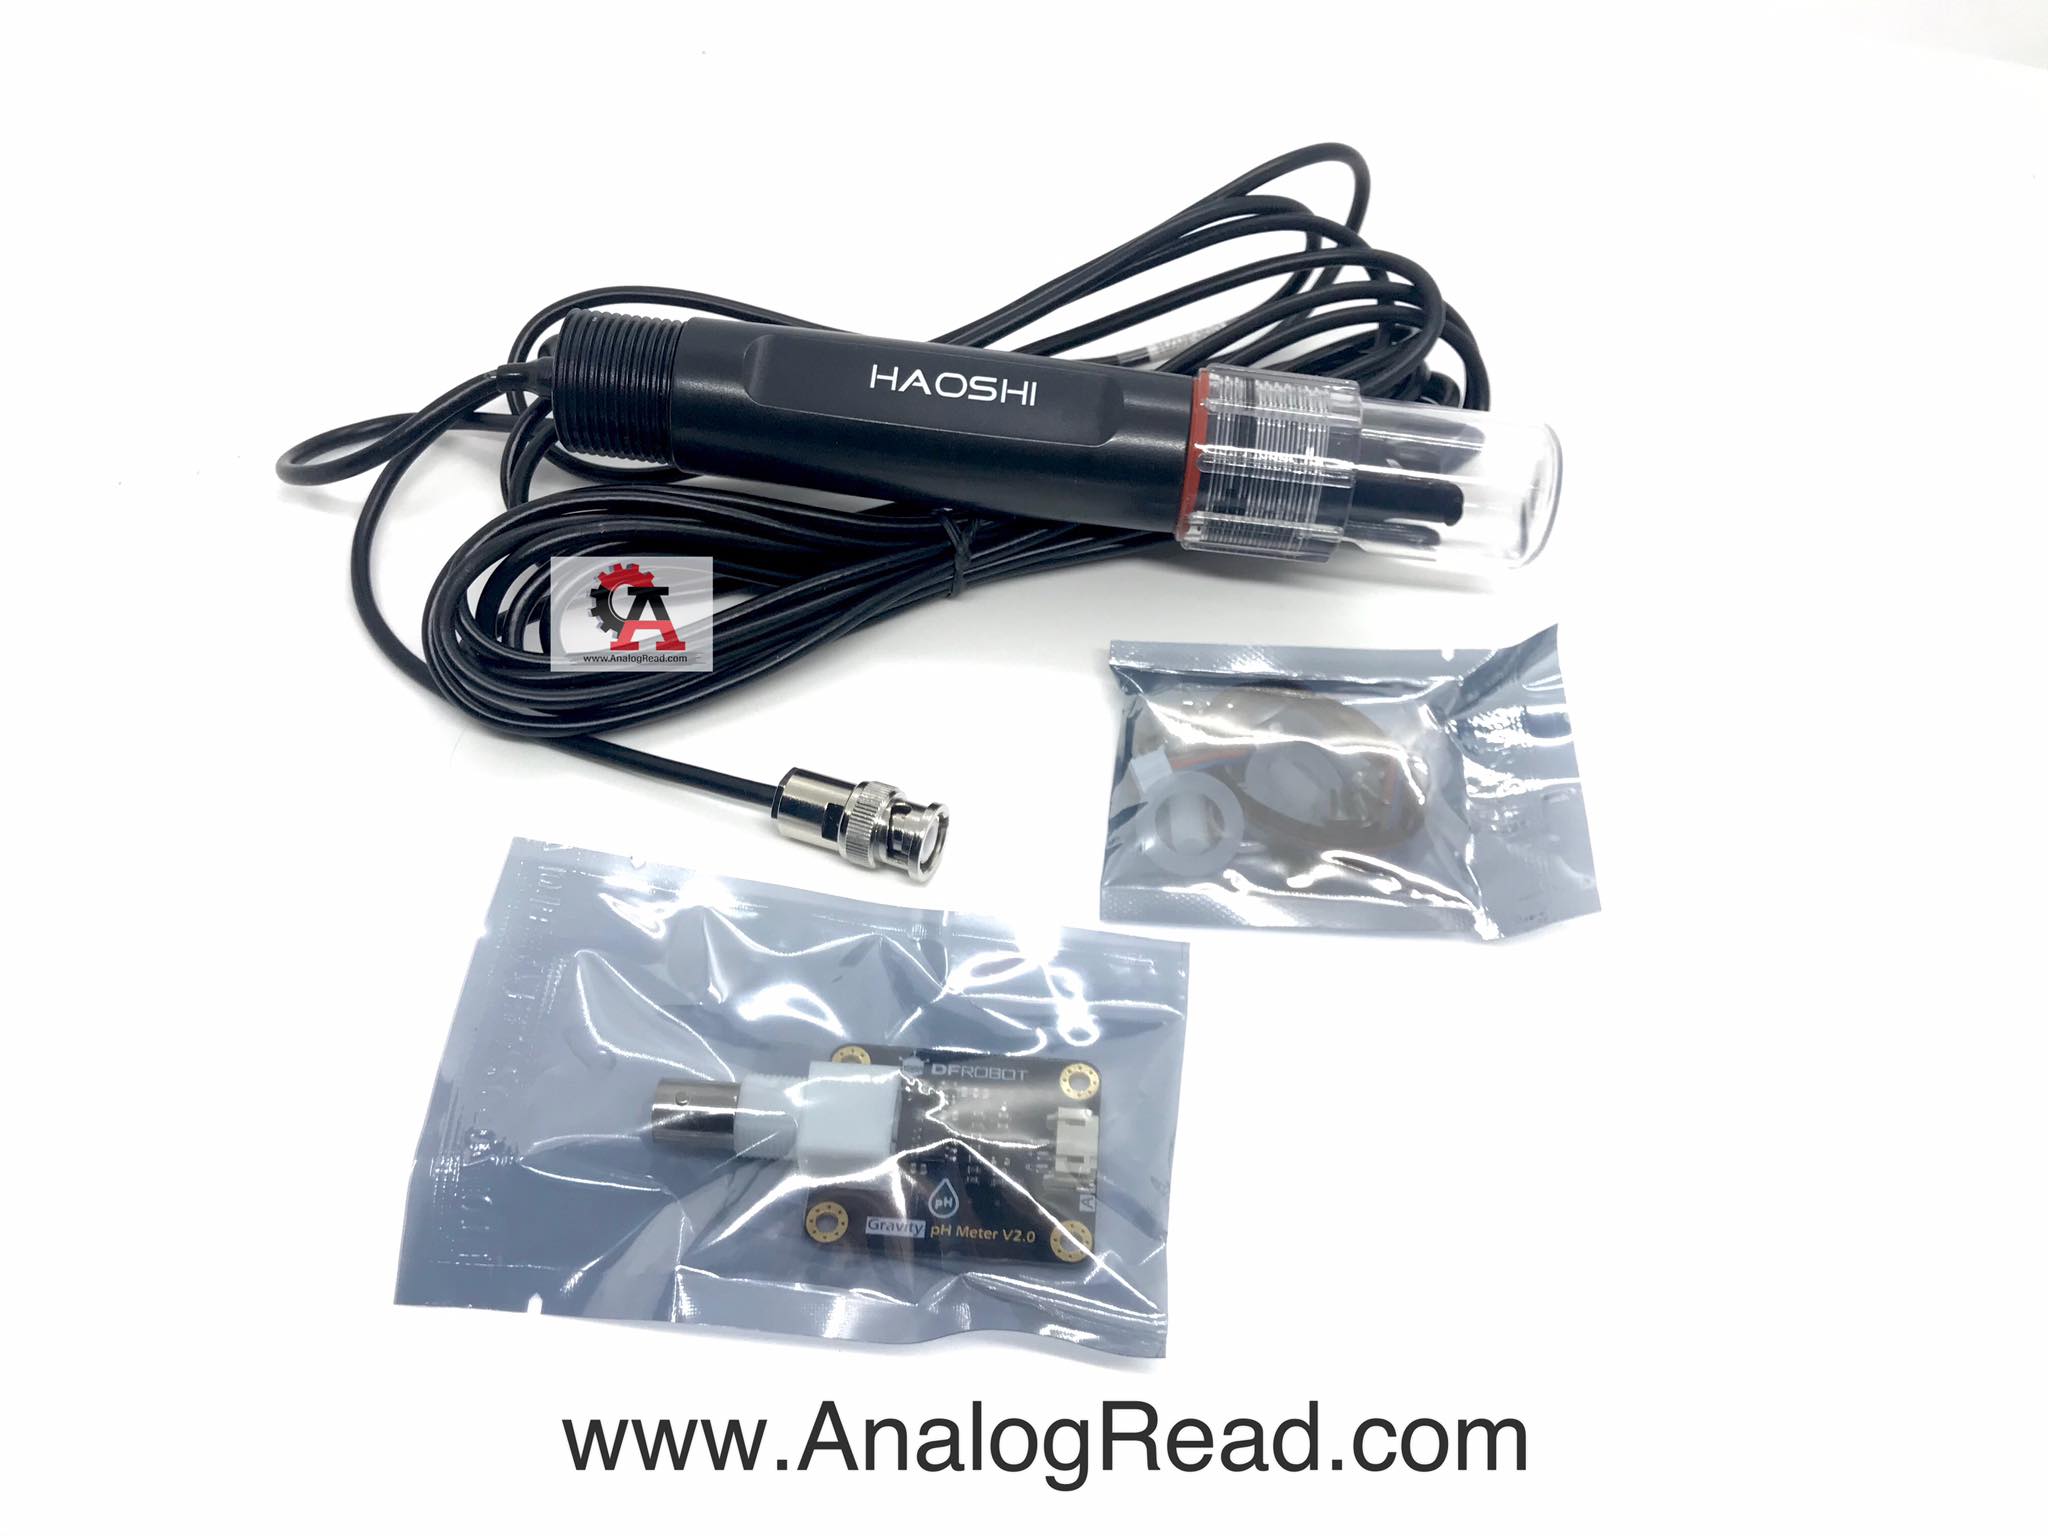
DFRobot Gravity: Analog pH meter pro V2 is specifically designed to measure the pH of the solution and reflect the acidity or alkalinity. It is commonly used in various applications such as aquaponics, aquaculture, and environmental water testing.
 
You may also check Liquid Sensor Selection Guide to get better familiar with our liquid sensor series. 
 
As an upgraded version of pH meter pro V1, the secondary generation pH meter pro greatly improves the precision and user experience. The onboard voltage regulator chip supports the wide voltage supply of 3.3~5.5V, which is compatible with 5V and 3.3V main control board, such as Arduino and LattePanda. The output signal filtered by hardware has low jitter. The software library adopts the two-point calibration method, and can automatically identify two standard buffer solutions (4.0 and 7.0), so simple and convenient. It uses an industry electrode and has built-in simple, convenient, practical connection and long life, very suitable for online monitoring.
 
This industry pH combination electrode is made of sensitive glass membrane with low impedance. It can be used in a variety of PH measurements with fast response, good thermal stability. It has good reproducibility, difficult to hydrolysis, and basically eliminate the alkali error. Between 0 to 14 pH range, the output voltage of the electrode is linear. The reference system which consist of the Ag/AgCl gel electrolyte salt bridge has a stable half-cell potential and excellent anti-pollution performance. The ring PTFE membrane is not easy to be clogged, so the electrode is suitable for long-term online detection.
 
With this product, the main control board (such as Arduino), and the software library, you can quickly build the pH meter, plug, and play, no welding. DFRobot provides a variety of water quality sensor products, uniform size, and interface, not only meet the needs of various water quality testing but also suitable for the DIY of multi-parameter water quality tester. You may also check Liquid Sensor Selection Guide to get better familiar with our liquid sensor series.
 
The pH is a value that measures the acidity or alkalinity of the solution. It is also called the hydrogen ion concentration index. The pH is a scale of hydrogen ion activity in solution. The pH has a wide range of uses in medicine, chemistry, and agriculture. Usually, the pH is a number between 0 to 14. Under the thermodynamic standard conditions, pH=7, which means the solution is neutral; pH<7, which means the solution is acidic; pH>7, which means the solution is alkaline.

Gravity: Analog pH Sensor /Meter Pro V2

Attention:
 
1. The BNC connector and the signal conversion board must be kept dry and clean, otherwise, it will affect the input impedance, resulting in an inaccurate measurement. If it is damp, it needs to be dried.
2. The signal conversion board cannot be directly placed on a wet or semiconductor surface, otherwise, it will affect the input impedance, resulting in the inaccurate measurement. It is recommended to use the nylon pillar to fix the signal conversion board, allow a certain distance between the signal conversion board and the surface.
3. The sensitive glass bubble in the head of the pH probe should avoid touching with the hard material. Any damage or scratches will cause the electrode to fail.
4. After completing the measurement, disconnect the pH probe from the signal conversion board. The pH probe should not be connected to the signal conversion board without the power supply for a long time.
 
FEATURES :
  • 3.3~5.5V wide voltage input
  • Hardware filtered output signal, low jitter
  • Gravity connector and BNC connector, plug-and-play, no soldering required
  • Software library supports two-point calibration and automatically identifies standard buffer solution
  • Uniform size and connector, convenient for the design of mechanical structures
  • Industrial Probe - Support 7*24 Measurement
  • Upgraded Transmitter - More Accurate and Stable
  • SPECIFICATION
  • Signal Conversion Board (Transmitter) V2
  •  
  • Supply Voltage: 3.3~5.5V
  • Output Voltage: 0~3.0V
  • Probe Connector: BNC
  • Signal Connector: PH2.0-3P
  • Measurement Accuracy: ±0.1@25℃
  • Dimension: 42mm*32mm/1.66*1.26in
pH Probe
  • Probe Type: Industrial Grade
  • Detection Range: 0~14
  • Temperature Range: 0~60°C
  • Accuracy : ± 0.1pH (25 ℃) 
  • Response Time: <1min
  • Probe Life: 7*24hours >0.5 years (depending on the water quality)
  • Cable Length: 500cm

Calibration

To ensure accuracy, the probe needs to be calibrated for its first use and after not being used for an extended period of time (once a month ideally). This tutorial uses two-point calibration and therefore requires two standard buffer solutions of 4.0 and 7.0. The following steps show how to operate two-point calibration.

  • 1.Upload the sample code to the Arduino board, then open the serial monitor, after you can see the temperature and pH. If you added a temperature sensor, be sure to write the corresponding function and call it.

  • 2.Wash the probe with distilled water, then absorb the residual water-drops with paper. Insert the pH probe into the standard buffer solution of 7.0, stir gently, until the values are stable.

  • 3.After the values are stable, the first point can be calibrated. Specific steps are as follows:

    • 1. Input ENTER command in the serial monitor to enter the calibration mode.

Ph_cal1.jpg

  • 2.Input CAL commands in the serial monitor to start the calibration. The program will automatically identify which of the two standard buffer solutions is present: either 4.0 and 7.0. In this step, the standard buffer solution of 7.0 will be identified.

Ph_cal2.jpg

  • 3. After the calibration, input EXIT command in the serial monitor to save the relevant parameters and exit the calibration mode. Note: Only after inputing EXIT command in the serial monitor can the relevant parameters be saved.

Ph_cal3.jpg

  • 4.After the above steps, the first point calibration is completed. The second point calibration will be performed below.

    • 4. Wash the probe with distilled water, then absorb the residual water-drops with paper. Insert the pH probe into the standard buffer solution of 4.0, stir gently, until the values are stable.

    • 5.After the values are stable, the second point can be calibrated. These steps are the same as the first calibration step. The specific steps are as follows:

  • 1. Input ENTER command in the serial monitor to enter the calibration mode.

  • 2.Input CAL commands in the serial monitor to start the calibration. The program will automatically identify which of the two standard buffer solutions is present: either 4.0 and 7.0 In this step, the standard buffer solution of 4.0 will be identified.

  • 3. After the calibration, input the EXIT command in the serial monitor to save the relevant parameters and exit the calibration mode. Note: Only after inputing EXIT command in the serial monitor can the relevant parameters be saved.

  • 4.After the above steps, the second point calibration is completed.

    • 6.After completing the above steps, the two-point calibration is completed, and then the sensor can be used for actual measurement. The relevant parameters in the calibration process have been saved to the EEPROM of the main control board.

Sample Code

Please download DFRobot_PH Library first,then install it. How to install Libraries in Arduino IDE?

/*
* file DFRobot_PH.ino
* @ https://github.com/DFRobot/DFRobot_PH
*
* This is the sample code for Gravity: Analog pH Sensor / Meter Kit V2, SKU:SEN0161-V2
* In order to guarantee precision, a temperature sensor such as DS18B20 is needed, to execute automatic temperature compensation.
* You can send commands in the serial monitor to execute the calibration.
* Serial Commands:
* enter -> enter the calibration mode
* cal -> calibrate with the standard buffer solution, two buffer solutions(4.0 and 7.0) will be automaticlly recognized
* exit -> save the calibrated parameters and exit from calibration mode
*
* Copyright [DFRobot](http://www.dfrobot.com), 2018
* Copyright GNU Lesser General Public License
*
* version V1.0
* date 2018-04
*/

#include "DFRobot_PH.h"
#include 

#define PH_PIN A1
float voltage,phValue,temperature = 25;
DFRobot_PH ph;

void setup()
{
Serial.begin(115200);
ph.begin();
}

void loop()
{
static unsigned long timepoint = millis();
if(millis()-timepoint>1000U) //time interval: 1s
{
timepoint = millis();
voltage = analogRead(PH_PIN)/1024.0*5000; // read the voltage
//temperature = readTemperature(); // read your temperature sensor to execute temperature compensation
phValue = ph.readPH(voltage,temperature); // convert voltage to pH with temperature compensation
Serial.print("temperature:");
Serial.print(temperature,1);
Serial.print("^C pH:");
Serial.println(phValue,2);
}
ph.calibration(voltage,temperature); // calibration process by Serail CMD
}

float readTemperature()
{
//add your code here to get the temperature from your temperature sensor
}

วิธีการสั่งซื้อสินค้า

วิธีการชำระเงิน

ราคาสินค้าหน้าเว็บรวมภาษีแล้ว


ค่าจัดส่งสินค้า ยอดสั่งซื้อต่ำกว่า 1000 บาท ค่าจัดส่งทาง EMS 50 บาท

                      ยอดสั่งซื้อ 1500 บาทขึ้นไป จัดส่งให้ฟรีทาง Kerry 
                   (ไม่รวมสินค้าหมวดหมู่DIY)


หลังจากสั่งซื้อและชำระเงินแล้ว จะต้องแจ้งชำระเงินทางหน้าเว็บเท่านั้น  หากไม่มีการแจ้งชำระเงินภายใน 72 ชม. ระบบจะยกเลิกคำสั่งซื้อโดยอัตโนมัติ หากท่านยังต้องการสั่งซื้อสินค้าอยู่ จะต้องทำการสั่งซื้อใหม่อีกครั้ง


      รายการที่แจ้งชำระเงินก่อนเวลา 15:00น. จะทำการจัดส่งในวันทำการเดียวกัน  รายการที่แจ้งชำระเงินหลัง 15:00น. จะจัดส่งในวันทำการถัดไป  จะทำการจัดส่งทุกวัน จันทร์-ศุกร์

      ***เฉพาะบริการจัดส่งKerryแจ้งยอดชำระก่อนเวลา10:30น. จะจัดส่งในวันทำการเดียวกัน
Kerryจัดส่งวันจันทร์-ศุกร์เท่านั้น

      *เฉพาะวันเสาร์ รายการที่แจ้งชำระเงินก่อนเวลา 10:00น. จะทำการจัดส่งในวันทำการเดียวกัน  รายการที่แจ้งชำระเงินหลัง 10:00น. จะจัดส่งในวันทำการถัดไป  


      หลังจากชำระเงินแล้ว คลิ๊กที่นี่ เพิ่อแจ้งชำระเงินทันที  หากไม่สะดวกในการแนบหลักฐานการโอนเงิน กรุณาแจ้งชื่อธนาคาร และเวลาโอนเงินที่ถูกต้อง หากไม่สะดวกในการเข้าหน้าเว็บจริงๆ สามารถส่งหลักฐานการโอนเงินมาได้ทาง Official Line ID :  @analogread   


 2.ชำระเงินผ่าน QR-CODE ฟรีค่าธรรมเนียม ทุกกรณี

...เลือกธนาคารที่แจ้งชำระเงินเป็น >>>>>>พร้อมเพย์<<<<<< หากมีค่าธรรมเนียมเกิดขึ้นทางเราจะใส่กลับคืนไปในกล่องพร้อมกับสินค้า


เลือกช่องทางที่คุณสะดวก เพื่อชำระเงินให้ร้านค้าโดยตรง หากมีข้อสงสัย กรุณา ติดต่อเรา

โอนเงินบัญชีธนาคาร
ธนาคารไทยพาณิชย์ จำกัด (มหาชน) สาขาเซ็นทรัลเฟสติวัล หาดใหญ่ ออมทรัพย์
พร้อมเพย์ สาขา- -
บัญชีออนไลน์
  • ค่าธรรมเนียม 3.9% + 11 THB
  • การชำระผ่าน PayPal คุณไม่จำเป็นต้องแจ้งชำระเงิน เนื่องจากระบบจะจัดการให้คุณทันที ที่คุณชำระเงินเสร็จสมบูรณ์

เลือกช่องทางที่คุณสะดวก เมื่อชำระเงินเรียบร้อย คุณจะได้รับอีเมลยืนยันการชำระเงินทุกครั้ง (LnwPay ไม่มีค่าธรรมเนียมเพิ่มเติม อ่านรายละเอียด)

บัตรเครดิต / บัตรเดบิต
คุณสามารถชำระเงินด้วยบัตรเครดิต (Credit card) หรือ บัตรเดบิต (Debit Card) ได้ทุกธนาคารและสถาบันการเงิน ที่มีสัญลักษณ์ VISA, MASTERCARD, JCB
หมายเหตุ: สำหรับการชำระด้วยบัตรเดบิต (Debit Card) จำเป็นต้องสมัครใช้บริการจากธนาคารก่อนชำระเงิน ดูวิธีสมัคร ธ.กสิกร | ธ.กรุงเทพ | ธ.กรุงไทย
ดำเนินการต่อเมื่อกดปุ่มนี้ ระบบจะพาคุณไปยังเว็บไซต์ LnwPay
แอพพลิเคชั่นธนาคาร
อีกก้าวของความสะดวกสบาย ให้คุณชำระเงินผ่าน แอพพลิเคชั่นธนาคารบนมือถืออย่าง K PLUS ของธนาคารกสิกรไทย เพียงกรอกเบอร์มือถือ ระบบจะส่งการแจ้งเตือนผ่านแอพ และกดชำระเงินได้ทันที
เลือกช่องทางที่ท่านต้องการชำระผ่าน:
K PLUS App
ดำเนินการต่อ เมื่อกดปุ่มนี้ ระบบจะพาคุณไปยังเว็บไซต์ LnwPay
อินเตอร์เน็ตแบงค์กิ้ง
บริการที่จะให้คุณชำระเงินค่าสินค้าได้อย่างง่ายดาย เพียงเข้าสู่ระบบบริการ i-Banking, e-Banking ของธนาคาร โดยคุณไม่จำเป็นต้องใส่รหัสร้านค้าให้วุ่นวาย เพียงเข้าสู่ระบบจากนั้นเลือกบัญชีที่ต้องการชำระ รับ SMS สำหรับ OTP และชำระเงินได้ทันที
เลือกช่องทางที่ท่านต้องการชำระผ่าน:
ธนาคารไทยพาณิชย์
ธนาคารกรุงเทพ
ธนาคารกรุงศรีฯ
ดำเนินการต่อ เมื่อกดปุ่มนี้ ระบบจะพาคุณไปยังเว็บไซต์ LnwPay
เงินสดผ่านเคาน์เตอร์
ชำระเงินผ่านเคาน์เตอร์ ผ่านจุดรับชำระเงินทั่วประเทศ สามารถจ่ายเงินได้ที่ 7-Eleven ทุกสาขา (ผ่าน Counter Service)
เลือกช่องทางที่ท่านต้องการชำระผ่าน:
Counter Service
ดำเนินการต่อ เมื่อกดปุ่มนี้ ระบบจะพาคุณไปยังเว็บไซต์ LnwPay
บัญชีออนไลน์
คุณสามารถชำระเงินผ่านบัญชีออนไลน์ที่คุณใข้บริการ ทั้ง truemoney Wallet และ LINE Pay โดยคุณสามารถเลือกตัดยอดเงินได้ทันที หรือจะชำระผ่านช่องทางต่างๆ ที่ผู้ให้บริการนั้นรองรับก็ได้เช่นกัน
เลือกช่องทางที่ท่านต้องการชำระผ่าน:
TrueMoney
LINE Pay
ดำเนินการต่อ เมื่อกดปุ่มนี้ ระบบจะพาคุณไปยังเว็บไซต์ LnwPay

นโยบายการเปลี่ยนหรือคืนสินค้า

*** สินค้ารับประกัน 30 วัน ***

สถิติร้านค้า

หน้าที่เข้าชม7,125,821 ครั้ง
ผู้ชมทั้งหมด2,822,719 ครั้ง
เปิดร้าน15 ก.ย. 2557
ร้านค้าอัพเดท6 ก.ย. 2568

อุปกรณ์ Arduino

เช็คสถานะสินค้า


ติดตามสินค้า

ระบบสมาชิก

ติดต่อเรา

พูดคุย-สอบถาม